First Person Controller
Some gameplay programming!
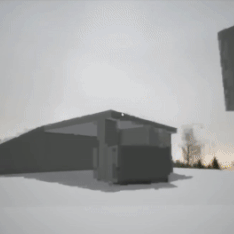
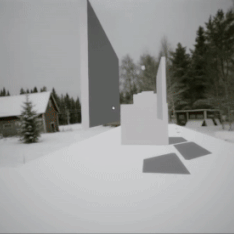
After a couple of months of intense rendering and engine programming I was getting tired. I wanted to get my mind off things and do something simple and fun. The specialization course gave me 4 weeks at 50% to do just that. I love the movement in games like Titanfall 2, Ghostrunner and Doom 2016.
My goal was to imitate these games.
Made in the engine that I helped create during the second year at TGA.


// State Machine
Avoiding Bloat
When first starting out, there was a lot of features planned for my First Person Controller. This meant that a lot of code would probably affect the character. My experience with character controllers are that they get bloated very fast. Usually, most code ends up in the same file, with a lot of quick and dirty fixes everywhere. This was exactly what I wanted to avoid this time around, and this state machine was my solution.
Simple Design
This is a very simple state machine. It contains a collection of states and an enum defining the current state. I decided to avoid a property-based approach with dynamic conditions and transitions, and instead settle for a CheckConditions() function. This means that the conditions cannot change after compilation, and that the author has to manually specify conditions. However, this also means that the author has a lot more freedom when specifying these conditions and transitions.
The CheckConditions() and Update() functions in a State are identical, the only difference is when they are called. Update() is only called for the current state, while CheckConditions() is called for every state each frame. The return-value of these functions is the resulting state. Type::NONE means that the current state should not change.
Shared Functions
The only remaining problem was how to deal with shared code between these states. I decided to introduce a helper-file, containing commonly used functionality like looking, moving and jumping.
The extra time spent on planning and implementing this system was something I did not regret. The states are modular and easy to toggle. Separating behaviour into independent states made the code naturally more structured. This made eveything much easier to visualize and debug while also keeping iteration times low.


// Movement
My first goal was to implement basic movement. This turned out to be a greater challenge than I anticipated.
Currently the rotation happens in two steps. Horizontal rotation is applied to the body and vertical rotation is applied locally to the head, which is parented to the body. Movement is relative to the direction of the body.
Head-bobbing was an additional detail which really gave the movement some weight while on the ground. I achieved this by adding the length of the current velocity to a variable each frame and then using abs(sin(variable)) to achieve both tilt and bob.
Friction
PhysX colliders provide a friction property, but the result using this type of friction was unreliable, especially when moving on slopes and in-air. I decided to manage all friction myself instead.


Slopes
Slopes were surprisingly hard to solve. Originally, if the character was running up a slope and reached the top, the velocity would be preserved, and the character would fly a small distance before returning to the ground. I had to create a threshold for the ground to air transition and also make sure that the character stayed on the ground when it was expected. Stronger gravity would not be enough. I knew that raycasts were neccessary.
The first iteration used one ray straight down below the character and moved the character to the position where the ray intersected the slope. This only worked for slopes with smaller angles. A greater angle meant that the intersection distance would increase, eventually getting outside the threshold. It also meant that the colliders would end up inside each other.
This was solved by shooting multiple rays beneath the player, each with a different offset. The ray with the smallest distance to first intersection is used when calculating offsets and velocity.
Jumping
One functionality of my character controller is jumping and double jumping. Deciding if a jump should add or set the vertical velocity is hard. First of all, jumping when falling isn't realistic in the first place, but if you could jump mid-air it would probably equal a vertical impulse. This is realistic, but unfortunately not very fun. When jumping in a video-game you expect the height of the jump to be consistent, no matter the velocity before jumping. For a fun and consistent jump, instead of using an impulse, you have to set the vertical velocity to the force of the jump.
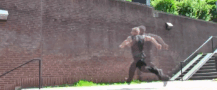
// Wall Running
My wall-running implementation was very simple. If the character is in-air and close to a wall, the character should transition to the wall-running state. Proximity to walls are decided by shooting rays to both sides of the character.
While wall-running, the character should not fall. Looking around should be the same but movement is relative to the surface-normal of the wall. An additional detail was making the head tilt away from the surface-normal. This made everything feel a lot better.
Future Improvements
Currently, the character can stay on a wall forever, even when standing still. Implementing a timer or a velocity threshold before the character starts falling or gliding down would create a more natural experience.
If the player is on ground, there is no way to enter the wall-running state. One natural transition would be to let the player transfer velocity upwards when running into a wall, and then going to the wall-running state. This would be similar to how it is sometimes done in parkour.
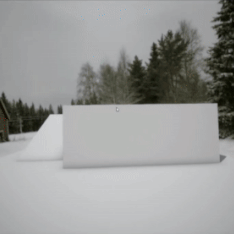
// Ledge Vaulting

A common feature in the games that I used as reference is the ability to quickly jump over small ledges. This technique is called ledge vaulting in parkour.
Once an intersection with an upwards-facing normal has been found, it's time to move the player over the ledge, to the intersection position. This is done using a simple lerp function.
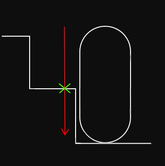
Ledge vaulting should be performed when in front of a ledge that is within grasping height for the player. This is possible to determine by shooting a ray in front of the head of the character and downwards towards the ground.
Improvements
This technique worked well but it didn't feel right when playing. Originally, a ledge vault could be performed at any moment. This led to ledge vaults happening at strange times, for example when standing still or while wall-running. I solved this by only allowing ledge vaulting to happen when the character is in-air or pressing space.
Ledge Vaulting the way I did it is different from all the other techniques because movement controls are disabled during the vault. This was done in order to avoid having to update the target position each frame. But taking away the freedom of movement is something that should be avoided. How could I strike a balance between simplicity and freedom? I decided to make it possible for the character to cancel the vault. This is done by looking away from the target position. In practice, all that is required is a comparison of the dot product between view direction and the target direction against a threshold.
Future Improvements
With certain velocities, there is a small risk of getting stuck in the middle of a vault. This is because of the character collider getting stuck at an uncommon angle. This could be fixed by using a timer before cancelling a faulty vault, or by forcing the colliders through each other by making the character kinematik during the lerp.
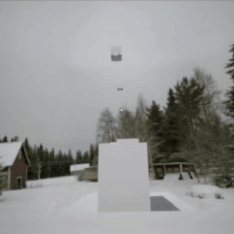
// Grappling Hook
Inspiration
Grappling hooks has been one of my favourite movement mechanics since I started playing flash-games, but one recent implementation stood out to me. Usually, a grappling hook lets the character swing around the hook-location in an arc, but in "Ghostrunner", the grappling hook simply pulls the character towards the selected hook-location instead. This is a genius design. Giving the player a speed-boost while letting the player move upwards fast only increases momentum, instead of slowing the player down by them having to calculate and time an accurate swing. This makes the hook behaviour a lot more predictable and fun, and also very simple to implement.
Implementation
The condition is simple, if a button is pressed, select the hook-location closest to where the character is looking which is also within a certain distance. Apply a force towards the target hook-location. The strength of this force should be enough to cover the distance between the character and the target. A greater distance means a greater force.
Proximity to view direction is compared using the dot product against the target location direction.
One thing I noticed was that a hook-location hidden behind another object would sometimes be targeted. This was solved using raycasts. When a target is in-range and closer to view direction than the previous closest hook-location, a ray will be cast between the current location and the character. The hook-location will only be used if nothing is blocking the ray.
Future Improvements
Currently, the resulting force is directly relative to distance. This works very well over short and average distances, but when the hook-location is far away, the resulting force becomes too great, resulting in the character flying past the targeted location.